Online STL Slicer Preview — Layers, Print Time & Filament Estimate
Slice an STL into layers, scrub through them and estimate time, filament and cost · free, no signup
See Online STL Slicer Preview — Layers, Print Time & Filament Estimate in action
Free Online STL Slicer Preview & Print Estimate
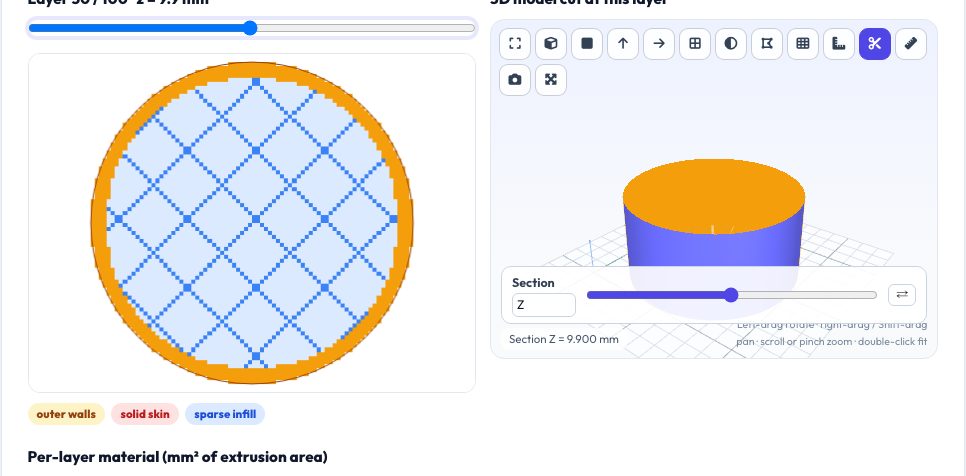
Before downloading a model or committing to a long print you often just want to know: how long will it take, how much filament will it use, and what will the layers look like? This tool slices your STL into true horizontal layers in your browser and lets you scrub through them with a slider, showing for each layer the outer walls, the solid top/bottom skin and the sparse infill, next to a 3D view of the model cut at the same height.
From your layer height, line width, wall count, infill percentage, top/bottom layers, speed and filament, it estimates print time, filament length and weight, and cost. The slicing itself is exact; the walls/skin/infill split is estimated from layer areas and neighbouring layers, so expect time within about ±20% of a real slicer — and you can enter a calibration factor from one known print to tighten it. It is not a G-code generator and does not add supports; it is for planning and previewing.
Key features
True layer slicing
Contours from your mesh at every layer, with open-contour detection.
Walls, skin and infill view
Colour-coded per layer with a synchronised 3D section.
Time, filament and cost
Based on your own settings, with a calibration factor.
Per-layer chart
See where material is used along the height of the part.
How to use it
- Drop in the STL (it slices automatically).
- Adjust layer height, walls, infill and speeds.
- Scrub the layer slider and watch the 3D section follow.
- Read the time, filament and cost estimates.
Worked example
Example
A 20 mm tall, 20 mm diameter cylinder at 0.2 mm layers, 2 walls, 4 top/bottom layers and 20% infill is 100 layers and uses roughly 3 g of PLA with a print time around 15–20 minutes at 60 mm/s.
Who uses this tool
Makers
Check a download's print time before starting a long print.
Print farms and sellers
Quick cost estimates for quotes.
Students
See how slicing, perimeters and infill work.
Tips for the best results
- Set the same speeds as your slicer profile for better time estimates.
- Use the calibration factor after comparing one real slice.
- Raise top/bottom layers to see where solid skin appears.
- Use the layer slider to find thin walls that may not print.
Common mistakes to avoid
- Treating the estimate as exact — acceleration and travel moves vary by printer.
- Slicing a non-watertight model and trusting the result.
- Forgetting that supports and brims are not included.
Why use AZRS QuickFix?
It is 100% free, needs no signup and has no watermark or usage limits. The tool runs in your browser, so what you type stays on your device, and it works on phones, tablets and desktops. New tools are added every week — bookmark this page or browse the full QuickFix toolbox.
Frequently asked questions
Does this create G-code?
No — it is a preview and estimator; use your slicer for G-code.
How accurate is the time?
Typically within ±20%; calibrate with one known print.
Does it include supports?
No. Use the overhang checker to see where supports are needed.
Is it private?
Yes — slicing happens in your browser.